Sejujurnya — kebanyakan kita menghabiskan lebih banyak masa merenung terminal berbanding kertas dinding desktop kita. Namun terminal lalai pada kebanyakan pengedaran Linux kelihatan seperti ia tersekat pada tahun 1995. Teks hijau pada latar belakang hitam, penyerlahan sintaks sifar dan gesaan yang memberitahu anda tiada apa-apa yang berguna.
Hujung minggu ini, mari kita betulkan. Saya akan membimbing anda melalui lima peningkatan praktikal yang akan mengubah terminal membosankan anda menjadi sesuatu yang anda benar-benar tidak sabar untuk menggunakan. Tiada gemuruh, tiada teori — hanya arahan yang boleh anda jalankan sekarang.
1. Ditch Bash, Peluk Zsh dengan Oh My Zsh
Jika anda masih menggunakan Bash sebagai pemandu harian anda, anda akan terlepas. Zsh (Z Shell) menawarkan pelengkapan tab pada steroid, pembetulan ejaan, sejarah arahan dikongsi dan ekosistem pemalam yang hanya boleh diimpikan oleh pengguna Bash.
Pemasangan
```bash
Pasang Zsh
sudo apt install zsh -y # Debian/Ubuntu
sudo dnf pasang zsh -y # RHEL/Fedora
Jadikan ia shell lalai anda
chsh -s $(yang mana zsh) ```Log keluar dan masuk semula, dan anda menjalankan Zsh. Tetapi stok Zsh tidak lebih cantik daripada Bash. Di situlah Oh My Zsh hadir — rangka kerja dipacu komuniti dengan beribu-ribu tema dan pemalam.
```bash
sh -c "$(curl -fsSL https://raw.githubusercontent.com/ohmyzsh/ohmyzsh/master/tools/install.sh)"
```
Pemalam Disyorkan Saya
| Pemalam | Apa yang Dilakukan |
|---|---|
| `git` | Alias (`gst` untuk `git status`, `gc` untuk `git commit`) |
| `pelabuh' | Penyiapan tab untuk arahan Docker |
| `sudo` | Tekan dua kali Esc untuk menambah `sudo` pada sebarang arahan |
| `ekstrak` | Satu arahan (`x`) untuk mengekstrak sebarang jenis arkib |
| `z` | Lompat ke direktori yang kerap dilawati mengikut nama |
| `carian web` | Cari Google/DuckDuckGo dari terminal |
Tambahkannya pada `~/.zshrc` anda:
```bash
plugins=(git docker sudo extract z web-search)
```
Pemalam yang saya tidak boleh hidup tanpa: `sudo` — hanya tekan Esc dua kali dan arahan semasa anda mendapat `sudo` ditampar di hadapan. Mengubah hidup untuk sysadmin.
2. Powerlevel10k — Gesaan Paling Cantik Yang Pernah Anda Lihat
Gesaan shell anda ialah perkara pertama yang anda lihat setiap kali anda menekan Enter. Powerlevel10k ialah, secara langsung, rangka kerja segera paling seksi untuk Zsh. Ia menunjukkan kepada anda:
- Cawangan dan status Git (kotor/bersih/depan/belakang)
- Masa pelaksanaan perintah
- Konteks Kubernetes semasa (ya, sungguh)
- Status bateri
- Masa
- Keluar kod arahan terakhir (merah jika bukan sifar)
Pasang
```bash
git clone --depth=1 https://github.com/romkatv/powerlevel10k.git \
${ZSH_CUSTOM:-$HOME/.oh-my-zsh/custom}/themes/powerlevel10k
```
Kemudian tetapkan `ZSH_THEME="powerlevel10k/powerlevel10k"` dalam `~/.zshrc` dan mulakan semula shell anda. Kali pertama anda menjalankannya, wizard konfigurasi interaktif membimbing anda melalui setiap pilihan — gaya segera, ikon, reka letak dan maklumat yang perlu ditunjukkan.
Petua Pro: Pilih gaya "Kurus" dengan ikon "Pelangi". Ia bersih, profesional, dan penunjuk status git berwarna sahaja berbaloi untuk ditukar.
3. Starship — Gesaan Cangkang Silang (Berfungsi Di Mana-mana)
Jika anda bertukar antara Bash, Zsh, Fish, atau bahkan PowerShell pada mesin yang berbeza, Starship ialah jawapan anda. Ia adalah binari Rust tunggal yang berfungsi sebagai gesaan yang minimum dan pantas untuk mana-mana shell. Tidak perlu pergantungan Oh My Zsh.
```bash
curl -sS https://starship.rs/install.sh | sh
```
Kemudian tambahkan pada konfigurasi shell anda:
```bash
~/.bashrc atau ~/.zshrc
eval "$(starship init bash)" # atau zsh
```
Starship dikonfigurasikan melalui satu fail TOML (`~/.config/starship.toml`). Inilah konfigurasi peribadi saya:
```toml
Minimal tetapi bermaklumat
format = """
[](#9a348e)\
$os\
$nama pengguna\
[](bg:#da627d fg:#9a348e)\
$direktori\
[](bg:#fca17d fg:#da627d)\
$git_branch\
$git_status\
[](bg:#86b6b2 fg:#fca17d)\
$kubernetes\
[](fg:#86b6b2)\
$fill\
$cmd_duration\
$time\
[](fg:#86b6b2)\
$character\
"""
[direktori]
panjang_pemangkasan = 3
[git_branch]
format = "[$symbol$branch]($style)"
gaya = "bg:#fca17d"
[cmd_duration]
masa_min = 2000
format = "⏱️ [$duration]($style)"
```
Bahagian yang terbaik? Starship menambah kependaman sifar pada gesaan anda. Ia ditulis dalam Rust dan menyimpan segala-galanya secara agresif.
4. Penyertaan Sintaks & Autocadangan — Taip Dengan Keyakinan
Dua pemalam Zsh yang akan mengubah sepenuhnya cara anda menaip arahan:
zsh-syntax-highlighting
Semasa anda menaip, perintah yang sah bertukar menjadi hijau, yang tidak sah kekal merah dan laluan fail akan digariskan jika wujud. Anda benar-benar tidak boleh menaip perintah yang tidak sah tanpa mengetahui dengan segera.
```bash
git klon https://github.com/zsh-users/zsh-syntax-highlighting.git \
${ZSH_CUSTOM:-~/.oh-my-zsh/custom}/plugins/zsh-syntax-highlighting
```
zsh-autosuggestions
Berdasarkan sejarah arahan anda, teks hantu muncul selepas kursor anda mencadangkan perintah yang lain. Tekan → untuk menerima cadangan. Lama kelamaan, ia mempelajari corak anda dan menjadi sangat tepat.
```bash
git klon https://github.com/zsh-users/zsh-autosuggestions.git \
${ZSH_CUSTOM:-~/.oh-my-zsh/custom}/plugins/zsh-autosuggestions
```
Tambahkan kedua-duanya pada susunan pemalam anda:
```bash
pemalam=(git docker sudo ekstrak z carian web zsh-syntax-highlighting zsh-autosuggestions)
```
Minggu pertama terasa pelik — anda terus menekan → kerana ingin tahu. Selepas sebulan, anda tidak boleh bayangkan bekerja tanpanya. Saya purata 30-40% kurang ketukan kekunci pada arahan berulang.
5. Satu Fon yang Anda Perlukan: Fon Nerd
Semua gesaan mewah dengan ikon (, , , ) memerlukan fon yang ditambal untuk dipaparkan dengan betul. Fon Nerd mengambil fon pengaturcaraan popular dan menambah ratusan glif dan ikon.
Kegemaran peribadi saya: JetBrains Mono Nerd Font
```bash
Muat turun dan pasang
wget -P /tmp https://github.com/ryanoasis/nerd-fonts/releases/download/v3.2.1/JetBrainsMono.zip
sudo unzip /tmp/JetBrainsMono.zip -d /usr/share/fonts/truetype/jetbrains/
sudo fc-cache -fv
```
Kemudian tetapkannya sebagai fon terminal anda — setiap emulator terminal utama (Terminal GNOME, Konsole, Alacritty, Kitty, iTerm2) menyokong fon tersuai.
Jangan langkau langkah ini. Tanpa Fon Nerd, gesaan Powerlevel10k atau Starship menunjukkan petak kosong atau tanda soal bukannya ikon. Ia adalah satu pergantungan yang menjadikan segala-galanya berfungsi.
Menyatukan Semuanya
Berikut ialah laluan naik taraf yang saya cadangkan untuk petang hujung minggu:
| Langkah | Tugasan | Masa |
|---|---|---|
| 1 | Pasang Zsh + Oh My Zsh | 10 min |
| 2 | Pasang Powerlevel10k + configure prompt | 15 min |
| 3 | Tambahkan penyerlahan sintaks + autocadangan | 5 min |
| 4 | Pasang Nerd Font + terminal kemas kini | 10 min |
| 5 | Perhalusi pemalam dan alias | 20 min |
Jumlah: kira-kira satu jam untuk terminal yang menjimatkan masa anda setiap minggu.
Terminal bukan sekadar alat — ia adalah kokpit anda sebagai sysadmin atau pembangun. Menghabiskan satu jam menjadikannya selesa, bermaklumat dan cantik ialah salah satu pelaburan ROI tertinggi yang boleh anda buat dalam aliran kerja harian anda. Setelah anda merasai terminal yang dikonfigurasikan dengan betul dengan Powerlevel10k, penyerlahan sintaks dan autocadangan, anda tidak akan kembali kepada lalai.
Teruskan — diri masa depan anda akan berterima kasih pada pagi Isnin depan.
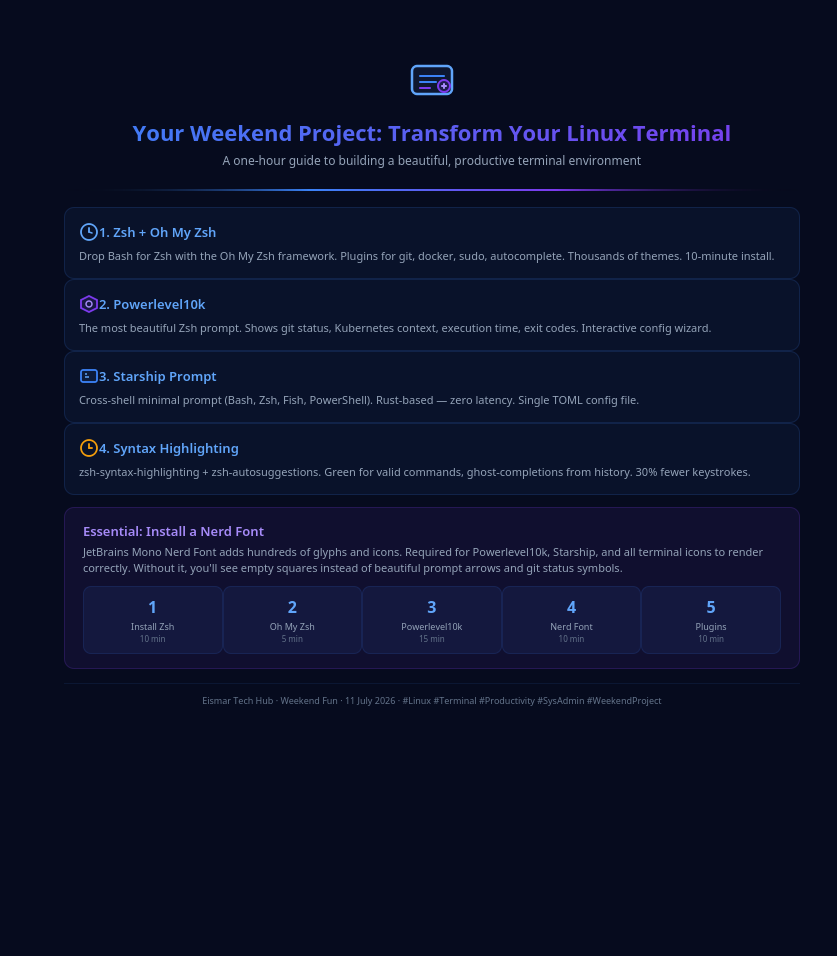
Infografik: Ubah Terminal Linux Anda

💬 0 Comments